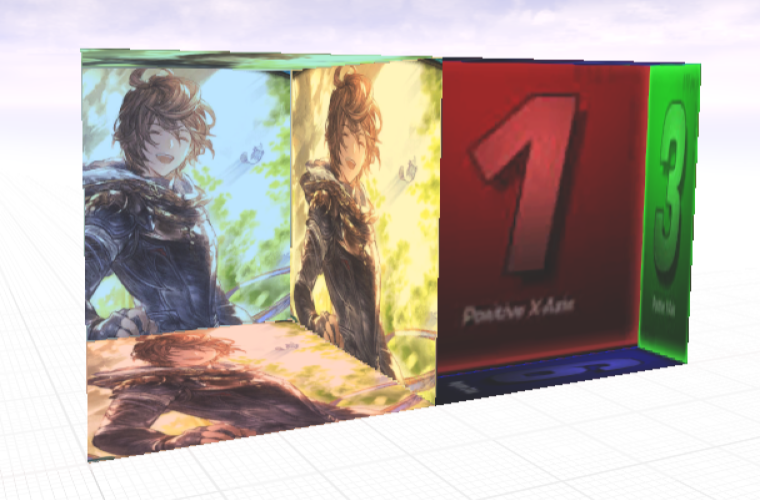
UE4内置的Interiormap节点可以快速实现该效果,这里仅作学习,运行效率并未优化
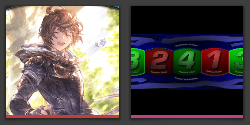
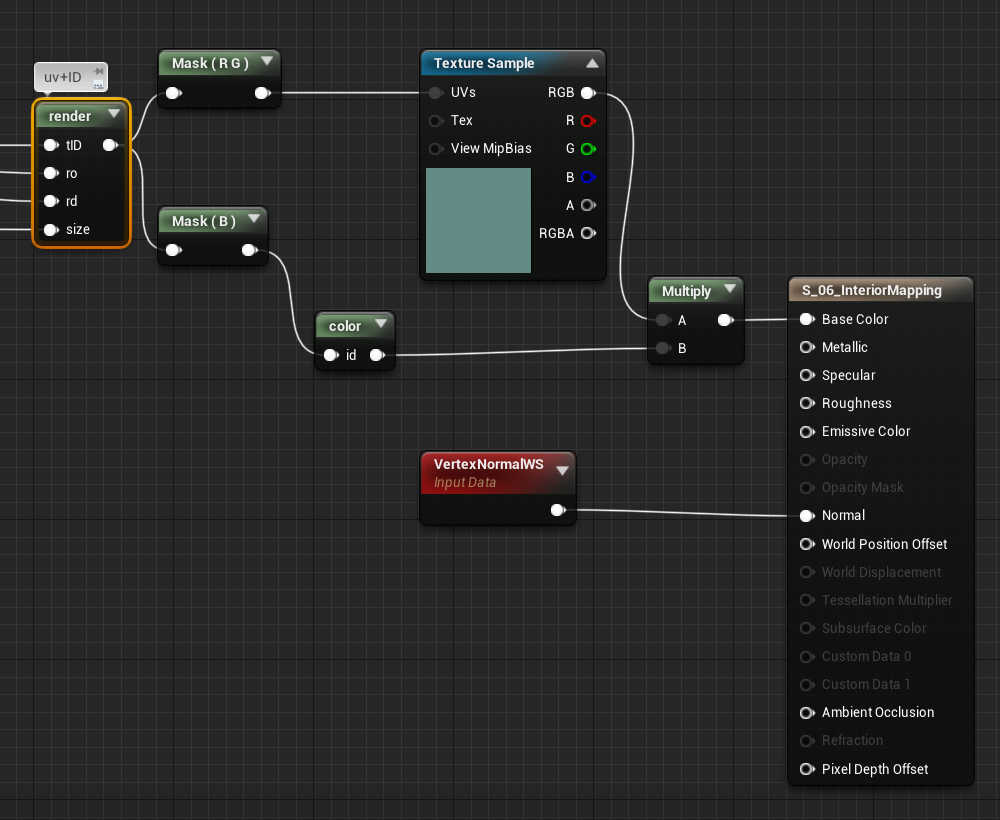
左边是普通贴图,各个面可以不一样,右边是一张cuebemap
1. 普通贴图shader
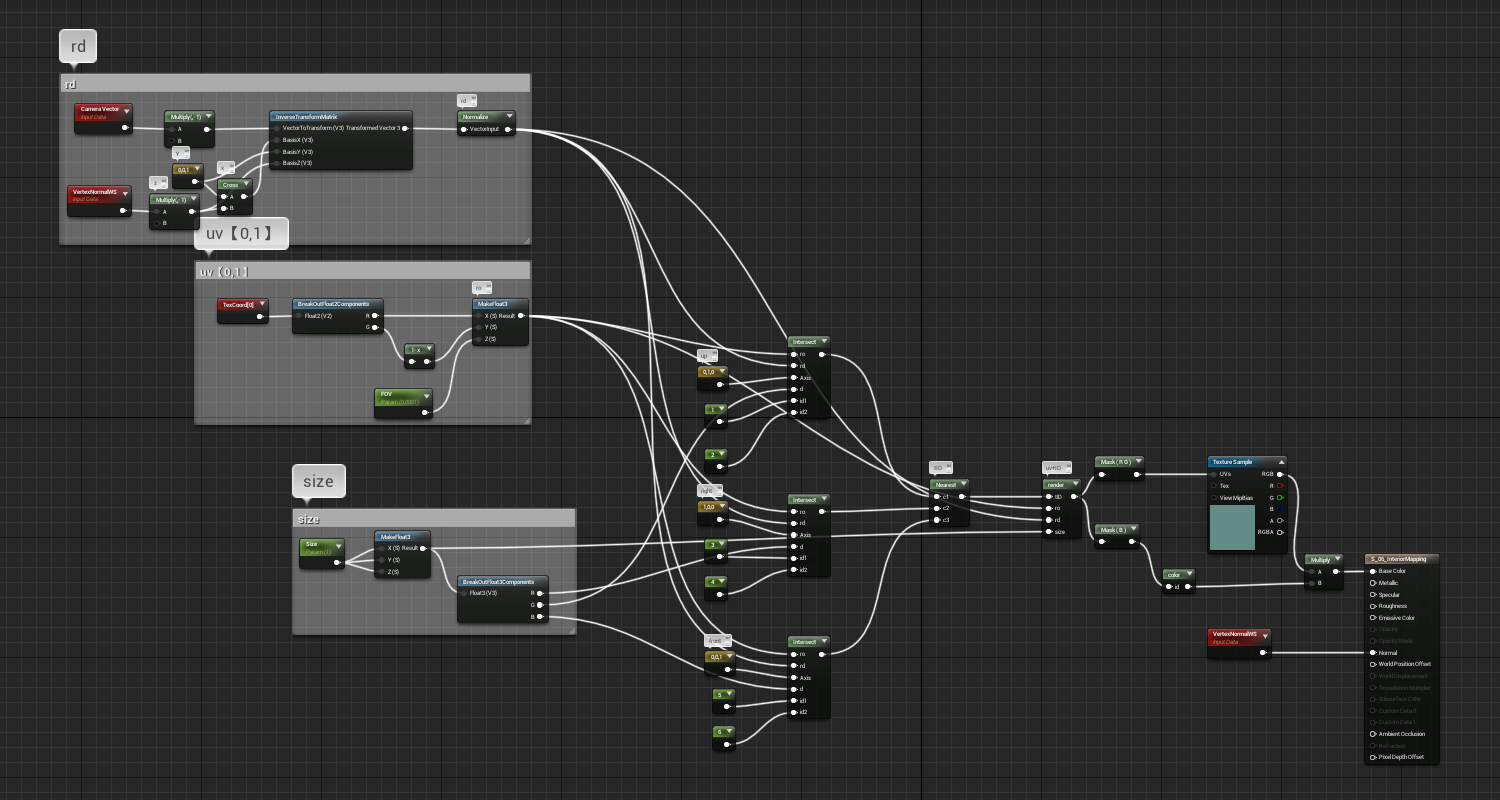
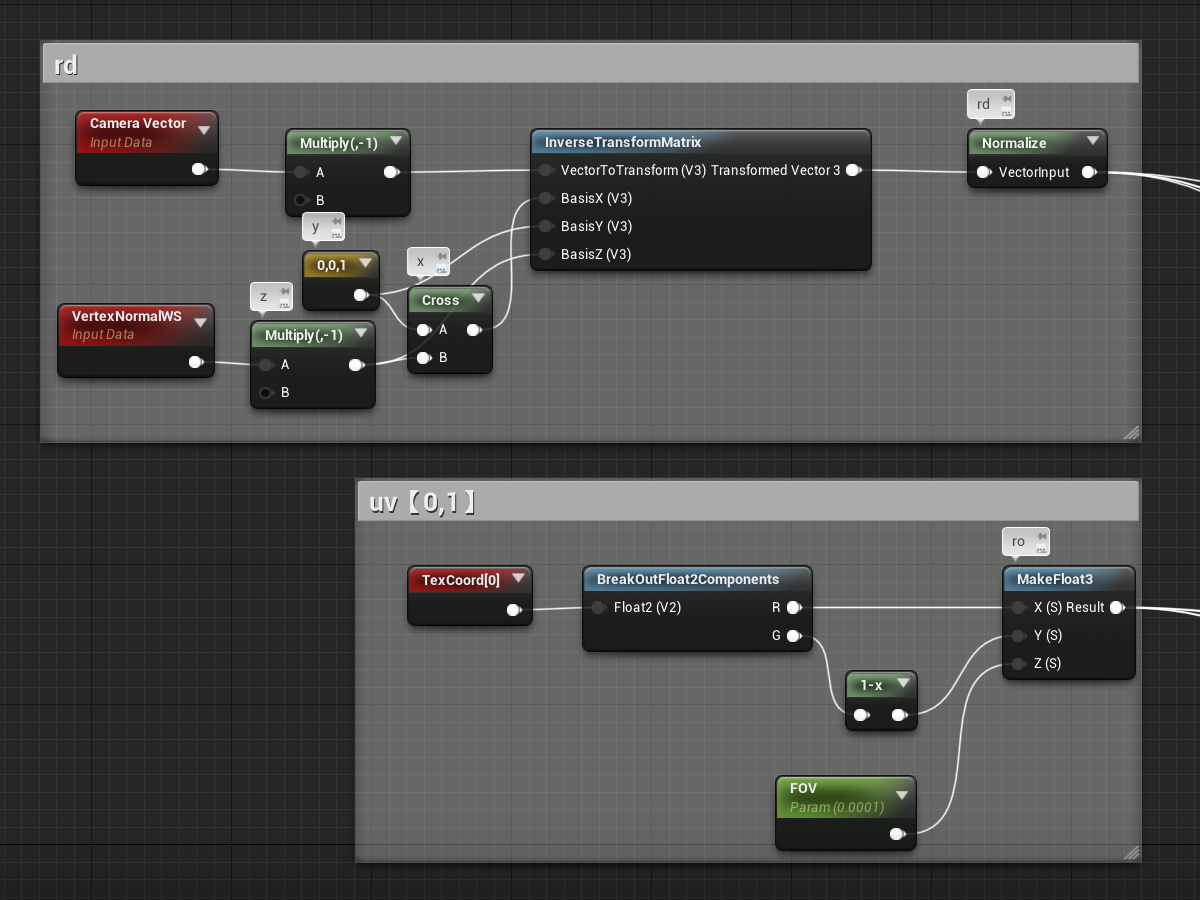
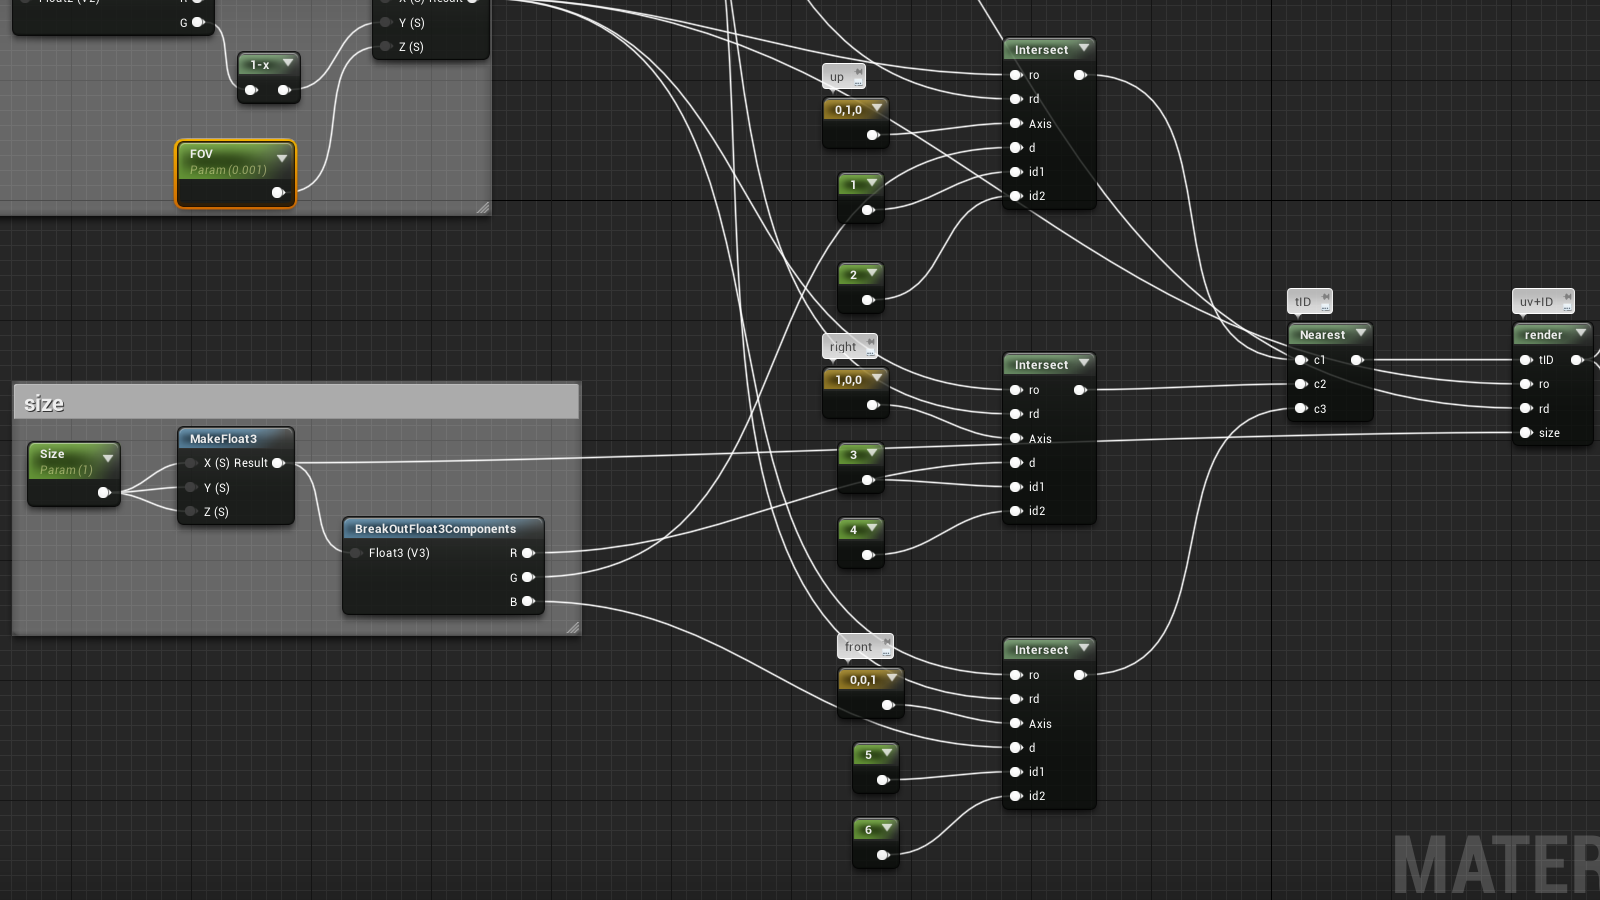
基本算法照着之前的Interior mapping
注意,如果照之前的做法,将UV映射到[-1,1],最少显示2x2的房间,中间的面无法消除
所以这里将UV保持在[0,1]区间,不做映射
FOV改成0.001,因为视锥角度为90度,$ \frac {1}{tan90°} $ 无限趋近0,所以设置为尽量小的0.001
1
2
3
4
5
6
7
8
9
10
11
12
13
14
15
16
17
| // Intersect 照搬之前的算法
float rd_weight = dot( rd, Axis );
float ro_weight = dot( ro ,Axis );
float pointer = ceil( ro_weight / d );
if( rd_weight > 0.0 ) // look up
{
float h1 = pointer * d;
float t1 = ( h1 - ro_weight ) / rd_weight;
return float2( t1, id1 );
}
else // look down
{
float h2 = ( pointer - 1.0 ) * d;
float t2 = ( h2 - ro_weight ) / rd_weight;
return float2( t2, id2 );
}
|
1
2
3
4
5
6
7
8
9
| // Nearest 照搬之前的算法
if( c1.x < c2.x )
{
return c1.x<c3.x? c1:c3;
}
else
{
return c2.x<c3.x? c2:c3;
}
|
1
2
3
4
5
6
7
8
9
10
11
12
13
14
15
16
17
18
19
20
21
22
23
24
25
26
27
28
29
30
31
32
33
34
35
| //render 照搬之前的算法
float t = tID.x;
float id = tID.y;
float3 pos = ro + t*rd;
pos = pos / size;
if (id>0.9 && id<1.1) //top
{
return float3( frac(pos.xz), 1.0 );
}
else if (id>1.9 && id<2.1) //bottom
{
return float3( frac(float2(pos.x,-pos.z)), 2.0 );
}
else if (id>2.9 && id<3.1) //right
{
return float3( frac(float2(-pos.z,-pos.y)), 3.0 );
}
else if (id>3.9 && id<4.1) //left
{
return float3( frac(float2(pos.z,-pos.y)), 4.0 );
}
else if (id>4.9 && id<5.1) //front
{
return float3( frac(float2(pos.x,-pos.y)), 5.0 );
}
else if (id>5.9 && id<6.1) //back
{
return float3( frac(pos.xy), 6.0 );
}
else
{
return float3( frac(float2(pos.x,-pos.z)), 7.0 );
}
|
2. Cubemap shader
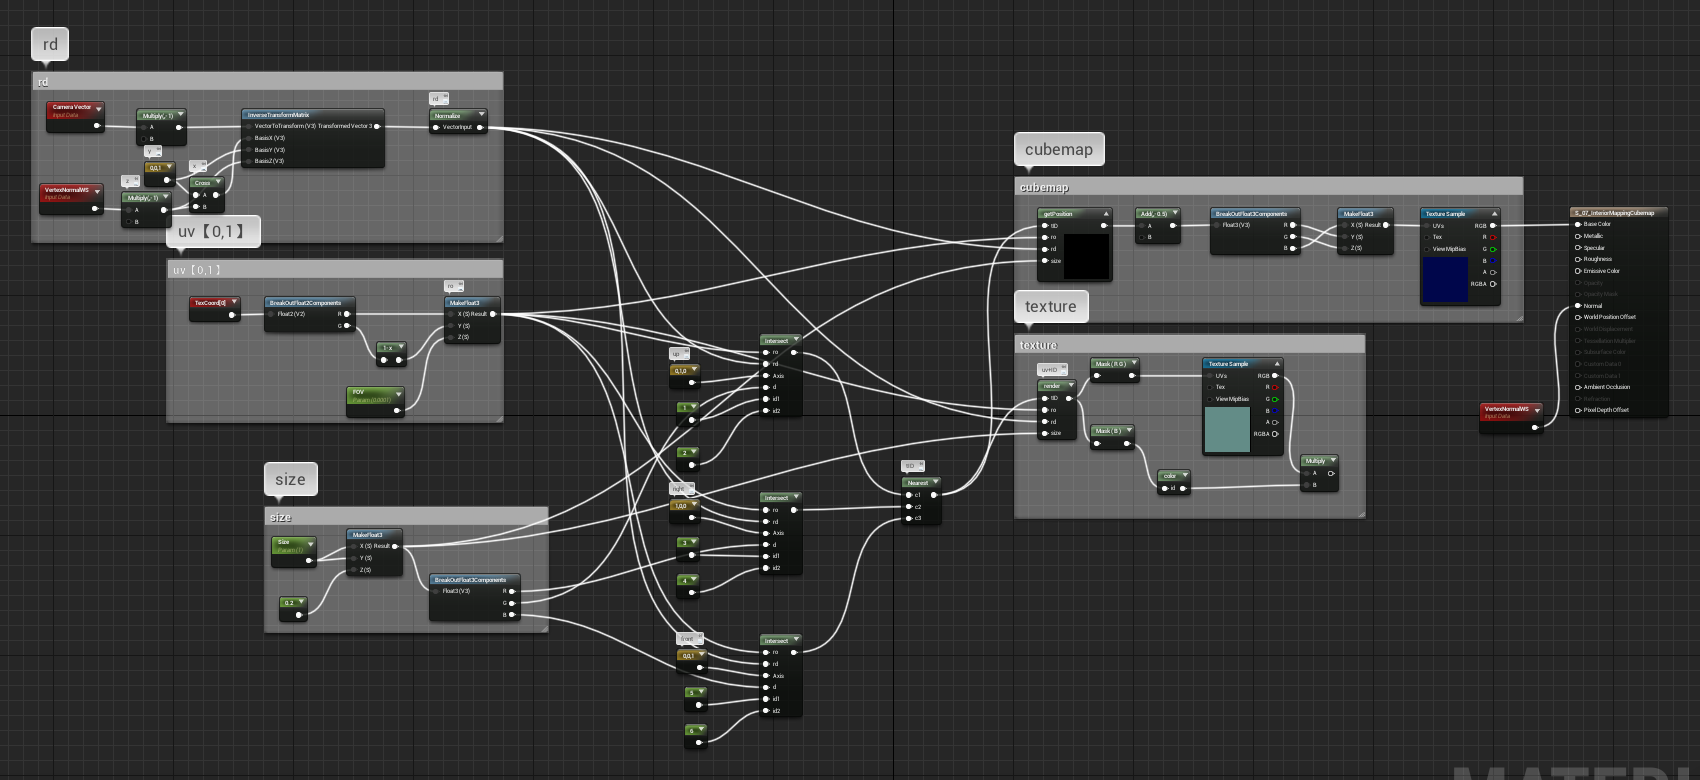
前面到Nearest都是一样的,cubemap用position信息作为UV
1
2
3
4
5
6
7
| float t = tID.x;
float id = tID.y;
float3 pos = ro + t*rd;
pos = pos / size;
return pos;
|
因为开头UV是在[0,1],原点没有移到中心,所以-0.5映射到[-0.5,0.5],即原点在中心
然后根据官方Interiormap节点的效果做了坐标轴转换

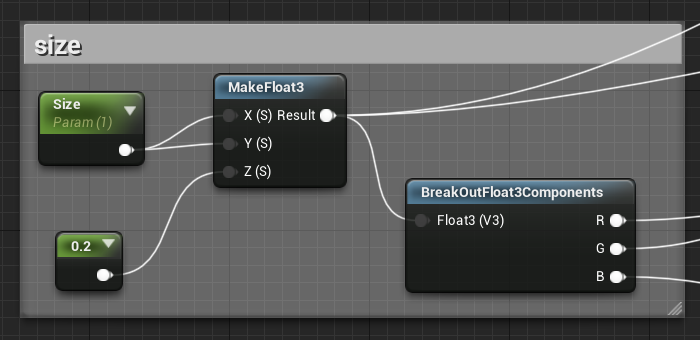
同时,为了模拟深度不同的房间,把size.z改成了0.2,可以看到房间进深变浅了
